Phil Hassey - game dev blog
Phil Hassey as Snidely Whiplash
"You can't buy awesomeness.
You're born that way."

Archive for July, 2010

Android Day 7: Leftovers

Wednesday, July 28th, 2010

I did some basic testing of the app, and I found a number of minor things to cleanup.

Step 1 – going back to single touch for better device support:

My use of MouseMotion didn’t work on the Droid because the Droid is Android 2.1 (SDK7). So that means e.getMaskedEvent() didn’t work. And though it seems the Nexus has support for some basic MultiTouch, it didn’t work on the Droid, so I’m dropping Galcon back to single touch. Most users only use single touch anyways.

Along with this I did my build at SDK level 4, so I could be sure I wasn’t doing anything else. Recall I have it set to 8 so that the build doesn’t choke on my android:installLocation=”preferExternal” .. So I’ll have to set it back to 8 once I’m done so that feature can be used on phones that support it.

Step 2 – finding out the UDID of the device:

Getting the UDID works on some platforms not others. Here’s a snippet:

    // JNI to get the ANDROID-ID
    public static String get_udid() {
        String r = Secure.getString(app.getContentResolver(), Secure.ANDROID_ID);
        if (r == null) { r = "unknown"; }
        Log.v("get_udid",r);
        return r;
    }

Step 3 – enabling in-game volume controls:

To get the volume control to work you have to add this to your onCreate method:

setVolumeControlStream(AudioManager.STREAM_MUSIC);

And have your onKeyDown method return false.

Step 4 – keeping the Droid keyboard from closing the game:

Getting the keyboard not to close the app on the Droid required adding this to the Activity tag:

android:configChanges="keyboard|keyboardHidden|orientation"

See this page for explanation:

http://developer.android.com/reference/android/R.attr.html#configChanges

Step 5 – Using Licensing vs standard Copy Protection:

I investigated the new Licensing stuff:

http://developer.android.com/guide/publishing/licensing.html

It appears to be fairly involved to add, so I’ll be passing on it for now. The drawback is that using the built-in copy protection of the marketplace requires that my app will be installed on the system memory. On the plus side, I’ve gotten Galcon down to 4MB, which is only 2% of the system memory. From reviewing the top 20 or so Android games, 4MB appears to be an acceptable size.

“A limitation of copy protection is that applications using it can be installed only on compatible devices that provide a secure internal storage environment. For example, a copy-protected application cannot be downloaded from Market to a device that provides root access, and the application cannot be installed to a device’s SD card.”

On the plus side, if I do decide to disable the standard copy protection in a future build and add licensing, I can do that via the publishing site apparently.

“After uploading your licensed application, remember to remove copy protection from the application, if it is currently used. To check and remove copy protection, sign in to the publisher site and go the application’s upload details page. In the Publishing options section, make sure that the Copy Protection radio button selection is “Off”.”

Step 6 – bugs due to overuse of memory:

I’ve noticed the occasional crash during my crossfade. The crossfade uses glCopyTexImage2D coupled with a 1024×1024 texture. That’s a good 4MB of memory and a function which seems to cause trouble. I’m going to remove that for now. The crossfade looks nice, but it doesn’t radically enhance the user experience. (Certainly not enough to off-set a crash!) If the crash persists, I’ll re-add the crossfade.

Step 7 – Signing the App:

Last phase is getting a signed version of my app created. This is required to submit an app to the marketplace. I’m not doing this immediately, but the directions here seem fairly straightforward.

http://developer.android.com/guide/publishing/app-signing.html

Android Day 6: Save games, Audio, other Details

Tuesday, July 27th, 2010

Okay .. the gameplay is totally working, so now it’s time to add a bit of polish to the game!

Step 1 – forced orientation:

If you want to set the orientation of your app to always be the same, add this to your AndroidManifest.xml Activity tag:

android:screenOrientation="portrait"

Otherwise, the app could start up in landscape mode which would give you a rotated OpenGL window, which for most games is probably not what you want.

Step 2 – handling Save / Restore of game state:

Now I want to get save / restore working in the game. As fun as it has been re-typing in my name every time I try the MultiPlayer stuff out, the fun is over. On the plus side, it’s given me plenty of opportunity to work out a few other bugs in there.

There are a ton of options for save / loading data.

http://developer.android.com/guide/topics/data/data-storage.html

I considered using the method named “External Storage” it would allow my app to save and load data from actual REAL files with REAL paths, which was attractive in terms of making my life easier, but there was a whole huge section on checking to make sure that is even possible. I guess there are like 3 cases where it might not work.

So since I’m big on not checking if something works, I decided I’d use the “Internal Storage” method which seemed a bit more idiot proof. It appeared to also have a way to find the folder name, so that will make things pretty easy.

    // JNI used to get Save data dir
    public static String get_docdir() {
        File fdir = app.getFilesDir();
        return fdir.getAbsolutePath();
    }

However, it seems that when saving, this is causing some kind of SIGSEGV .. From what I can tell the “JNIEnv* env” that is passed to my C code isn’t the same on every call. So what I’m doing now is I’m saving the first one and only using that, not updating it as new values come in to my code. (Some of the values sent in later looked suspicious to me. Some were even null!)

Step 3 – adding music:

One of my favorite parts of game development is getting the sound working. It always makes the game feel like it’s ready to go. This is the link to read:

http://developer.android.com/guide/topics/media/index.html#playfile

Here’s the code I came up with to play music. Again, I’m storing all my game assets in the assets/ folder since that gives me the most simple direct access to it.

    // JNI to play music, etc
    public MediaPlayer _music = null;
    public static void music_play(String fname) {
        Log.v("music_play",fname);
        AssetManager am = app.getAssets();
        try {
            AssetFileDescriptor fd = am.openFd(fname);
            app._music = new MediaPlayer();
            app._music.setDataSource(fd.getFileDescriptor(),fd.getStartOffset(),fd.getLength());
            fd.close();
            app._music.setLooping(true);
            app._music.prepare();
            app._music.start();
        } catch(IOException e) { }
    }
    public static void music_stop() {
        if (app._music == null) { return; }
        app._music.stop();
    }
    public static void music_volume(float v) {
        if (app._music == null) { return; }
        app._music.setVolume(v,v);
    }

Step 4 – adding sound effects:

Time to add in sound effects. This is done with the SoundPool class. It might actually be easier to use this class for music as well.

    // JNI to play sounds
    public SoundPool _sounds = new SoundPool(8,AudioManager.STREAM_MUSIC,0);
    public static int sound_load(String fname) {
        AssetManager am = app.getAssets();
        try {
            AssetFileDescriptor fd = am.openFd(fname);
            int sid = app._sounds.load(fd.getFileDescriptor(),fd.getStartOffset(),fd.getLength(),1);
            return sid;
        } catch(IOException e) { }
        return 0;
    }
    public static void sound_play(int sid) {
        app._sounds.play(sid,(float)1.0,(float)1.0,0,0,(float)1.0);
    }

Step 5 – opening up the web browser to a URL:

In my game I’ve got a handful of spots where I let the user open up a webpage (more games, forums, etc…) Here’s the code:

    public static void open_url(String url) {
        Intent intent = new Intent(Intent.ACTION_VIEW);
        intent.setData(Uri.parse(url));
        app.startActivity(intent);
    }

Step 6 – adding the app icon:

It’s about time I got an Icon ready for this app. I’m going to use my Galcon Fusion style icon since that one works nicely with transparency. You can get really fancy with providing a bunch of different icon sizes:

http://developer.android.com/guide/practices/ui_guidelines/icon_design.html

But I just provided a single 72×72 icon.png which I put into res/drawable. And then I added this into the Application tag of my AndroidManifest.xml:

android:icon="@drawable/icon"

That seemed to be sufficient.

Step 7 – further thoughts on pause / resume:

Another cleanup item I found was getting pause/resume working more “the Android way” .. Or at least, working at all. Again, I reviewed this and made some changes to how my app works.

http://developer.android.com/reference/android/app/Activity.html

Working on this sent me into a spiral of weird crashes for no particular reason. I sprinkled around the “synchronized” keyword with no luck. I did some code cleanup and fixed some memory leaks and now it seems better. A bit tricky though, I can’t always tell why things happen.

In general, I found that during onStop you should free up all your audio assets, so that on the next onStart you could reload them. I also found that the GL assets automatically get freed, so on any onSurfaceChanged you need to reload your GL assets.

But the game is seeming pretty stable now. Time to set it in for some testing for a while 🙂

-Phil

Android Day 5: Keyboard, Multiplayer / Networking

Monday, July 26th, 2010

After a weekend of recouping from last week’s barrage of code .. I’m back!

Step 1 – Displaying the Software Keyboard:

Okay, the keyboard took forever to figure out. In fact half of Day 4 was burned on this one. I’m not going to go into the horrifying details, but here’s the best hack I could come up with to show and hide the android keyboard on demand. I’ll leave the JNI integration as an exercise to the reader. (I also have included the event handler, this is pretty straightforward, but clearly demonstrates the obtuseness of Java APIs. In python, this would certainly be simpler 😉 Anyway, this code can be pasted into your main Activity where “app” is a static reference to your Activity object.

    boolean _keyboard_state = false;
    public void toggle_keyboard() {
        InputMethodManager mgr = (InputMethodManager)app.getSystemService(Context.INPUT_METHOD_SERVICE);
        mgr.toggleSoftInput(InputMethodManager.SHOW_IMPLICIT,0);
        app._keyboard_state = !app._keyboard_state;
    }

    // JNI used to call this from C/C++
    public static void show_keyboard() {
        Log.v("keyboard","show");
        if (!app._keyboard_state) { app.toggle_keyboard(); }
    }

    // JNI used to call this from C/C++
    public static void hide_keyboard() {
        Log.v("keyboard","hide");
        if (app._keyboard_state) { app.toggle_keyboard(); }
    }

    public boolean onKeyDown(int keycode, KeyEvent e) {
        Log.v("keydown",Character.toString(Character.toChars(e.getUnicodeChar())[0]));
        // native call to send Event to C/C++ code
        return true;
    }

And now we’re onto ..

Step 2 – Debugging Multiplayer:

Testing multiplayer. Well, it appears we might be entering some trouble. First of all, it seems I have to enable permission for my app to access the internet. I add this into my AndroidManifest.xml:

    <ses-permission android:name="android.permission.INTERNET" />

This seemed to get it to do something, but usually that something is SIGSEGV. Time to fire up GDB. Earlier I covered basic debugging, but not how to use GDB with the Android. Basically, in the NDK, you’ll want to read “docs/NDK-GDB.TXT” .. Unfortunately this seems to crash the event loop in Java somehow everytime. So it isn’t doing me any good.

– When I first start gdb it gives me: “0xafd0eb68 in ?? ()” which blocks all event handling.
– I tell it to “continue” which seems to get things going again.
– But when it hits the MP code that crashes, it says

Child terminated with signal = b 

Program terminated with signal SIGSEGV, Segmentation fault.
The program no longer exists.
(gdb)
Child terminated with signal = 0xb (SIGSEGV)
GDBserver exiting
(gdb) backtrace
No stack.

So my attempt at getting a backtrace is futile. Huh. This made me think maybe I’m coming into some kind of multi-threading issue. (While the events were blocked, the logic loop and graphics continued, indicating some two separate threads.) ndk-gdb does not support multi-threaded apps. The Galcon code is also single threaded, so it can’t cope with multi-threaded stuff either. I went to all my native methods and added the synchronized keyword:

 public synchronized native void event(....);

This cleared up some of my crashes.  However, when joining a server I get a SIGBUS, which I’m not entirely sure what it is, but it sounds like a SIGSEG except worse.

This could be an alignment error. I’ll download enet 1.2.2 as it includes a changelog item: “now uses packed attribute for protocol structures on platforms with strange alignment rules” .. IIRC, I fixed that in my local copy of Enet to get it working on the iPad, but I’ll check this version out. And thanks to the general awesomeness of ENet the packing bug is fixed, so now I’ve got full-mulitplayer working. Embarrassingly enough I got noob-stomped pretty bad.

Android Day 4: Video cleanup, Input handling

Friday, July 23rd, 2010

Whew, day 3 was epic! I’m glad I got through all that! Day 4 (I hope) will be a bit easier. Now that I’ve got things “basically” working, it should be mostly a matter of getting a few more API calls doing what they need to do.

Step 1 – Basic handling of onPause:

First of all, right now when I restart the App without reinstalling it, I get a white screen. I think this is due to some multitasking feature on the Android where it shoves the App into the background and tells it to pause. When unpaused, I need to reload the graphics. Fixing this was pretty trivial, I just added a few lines to the onPause() method to save state and basically shutdown.

Step 2 – Removing the title bar:

When I start my game, there is a title that says “Galcon” in text on the top. I think that is part of the default app generation. I’ll want to remove that. First of all, in “res/layout/main.xml” I commented out the TextView. This had no effect, but at least I cleared out some junk. This page appears to explain how to hide the title bar (I found by adding .Fullscreen it hides the Status Bar as well.)

http://developer.android.com/guide/appendix/faq/commontasks.html – modify AndroidManifest.xml:

<application android:icon=”@drawable/icon” android:theme=”@android:style/Theme.NoTitleBar.Fullscreen”>

Step 3 – Adding onTouchEvent handling:

I really want to start playing the game – so I’m going to add some input event handling. I’ll do this from the top level in my Activity by adding a onTouchEvent handler. The documentation for MotionEvent was a bit opaque, but I worked it out and here’s how to handle events and deal with MultiTouch. It seems like something is severely broken about the API, but this was the only way I could get MultiTouch to work in Galcon. It appears to only work with 2 fingers.

    public boolean onTouchEvent(final MotionEvent e) {
        for (int i = 0; i<e.getPointerCount(); i++) {
            boolean masked = false;
            switch(e.getActionMasked()) {
                case MotionEvent.ACTION_POINTER_DOWN:
                case MotionEvent.ACTION_POINTER_UP:
                    masked = true;
                break;
            }
            if (masked && i != e.getActionIndex()) { continue; }
            float x = e.getX(i); float y = e.getY(i);
            float dx = 0; float dy = 0;
            if (e.getHistorySize()!=0) {
                dx = x - e.getHistoricalX(i,0);
                dy = y - e.getHistoricalY(i,0);
            }
            int pid = e.getPointerId(i);
            int type = 0;
            switch(e.getActionMasked()) {
                case MotionEvent.ACTION_DOWN: type=EVT_DOWN; break;
                case MotionEvent.ACTION_MOVE: type=EVT_MOTION; break;
                case MotionEvent.ACTION_OUTSIDE: type=EVT_MOTION; break;
                case MotionEvent.ACTION_POINTER_DOWN: type=EVT_DOWN; break;
                case MotionEvent.ACTION_POINTER_UP: type=EVT_UP; break;
                case MotionEvent.ACTION_UP: type=EVT_UP; break;
                case MotionEvent.ACTION_CANCEL: type=EVT_UP; break;
            }
            event(type,(int)x,(int)y,0,pid+1,(int)dx,(int)dy,0,0);
            if (masked) { break; }
        }
        return true;
    }

This works okay, except my Nexus One has a different screen resolution than my iPhone, so all my code is handling things a bit off. I added a native call in onSurfaceChanged to tell my game the size of the screen. In my event handler I translate for the game.

Step 4 – Keyboard handling:

To play the multi-player game, I need to have the pop-up keyboard work. On the Droid, of course, this isn’t needed, but for the Nexus One and possibly other future devices it is.

This is apparently easier said than done. More on it in day 5!

Android Day 3: Packaging, Assets, JNI, and OpenGL

Thursday, July 22nd, 2010

I considered using SDL for this port, however, I became concerned that none of the ports were quite ready for prime time. None of them have been really released as complete and stable packages, and there are enough weird things about Android that I think I’ll be better off doing the work directly myself. Galcon is an “OpenGLES” app in essence, so much of what SDL provides is unnecessary anyways. But if you are interested:

There is a summer of code project relating to this:

http://socghop.appspot.com/gsoc/student_project/show/google/gsoc2010/sdl/t127230762779
http://hg.libsdl.org/SDL-gsoc2010_android/summary

And there’s also another SDL port here:

http://www.anddev.org/code-snippets-for-android-f33/sdl-port-for-android-sdk-ndk-1-6-t9218.html

Step 1 – Using command line tools instead of the Eclipse IDE:

I also decided that avoiding Eclipse might be a good move. I’m sure there are those of you who would argue otherwise. But, err, I’m a CLI kind of guy, so we’ll see how it goes.

First I added ~/android/tools to my path, so that I wouldn’t have to keep typing in the whole path 🙂

In my Galcon android folder, I ran this command:

$ android create project -t “android-4” -k com.igalcon.galcon -a Galcon -n Galcon -p .

Which created my other project files.

Then to create a debug build of Galcon:

$ ant debug

Then to install it onto my device:

$ adb devices

List of devices attached

emulator-5554 device

deviceid device

$ adb -s install bin/Galcon-debug.apk

And the app is installed, and I can run it. However, at this point I’ve just got a Hello World thing showing up, so I’ve got a long way to go until I’ve got Galcon appearing 🙂

Step 2 – Including resources (graphics, audio) with your game:

There are a number of options as to how to bring data long for your game. A few are explained on this page:

http://developer.android.com/guide/topics/resources/providing-resources.html

I made a folder called “assets” and placed all my game assets in it. Instead of mp3s, I include ogg files. And instead of .wav, I include ogg files. On the Android handhelds, there is only 256 MB of internal storage. Many games just pack the binary and then download the data separately onto the users flash card. I deem that to be totally unawesome and will ship Galcon with all its data. But I will do my best to pack as little data into my binary as possible. By using oggs instead of mp3s and wavs, I’ve trimmed a couple MB off my data size.

UPDATE: App can request to be stored on the SD card! http://developer.android.com/guide/appendix/install-location.html

To do this, add android:installLocation=”preferExternal” to the manifest tag in AndroidManifest.xml .. And while you’re at it, add in <uses-sdk android:minSdkVersion=”4″ /> to require OpenGLES 1.1 support. Also change target=android-8 in default.properties.  This will give a warning since your minSdkVersion and your target aren’t the same.  Just read that link above for more info.

If you save your files in “res” folders, some kind of Android magic kicks in and it seems you can’t reference anything by a String. You have to use Java IDs, which makes it really hard for C code to say “get me file X” .

Files saved in the assets/ directory are not given a resource ID, so you can’t reference them through theR class or from XML resources. Instead, you can query files in the assets/ directory like a normal file system and read raw data using AssetManager.

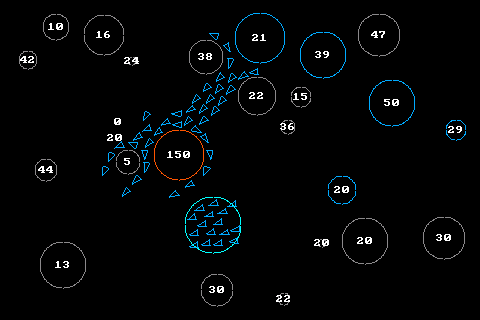
At this point, I’ve got a basic project building, and I’ve got assets included in my package. (I can tell this because my package is 3MB, not 200k like a empty Hello World example.) I think 3MB is an acceptable size.

Step 3 – Debugging the game:

Next I need to figure out how to get debugging working. I’m pretty sure I’m going to have bugs, so .. doing on-device debugging will be ideal. Again, if I were to take the wimp’s way out, I’d use Eclipse (I guess? for me actually, Eclipse seems like a greater learning curve..) but I’ll be using CLI methods to debug. I’ve edited Galcon.java and added a Divide by Zero bug, so I can see how it appears. And upon installing it, it crashes.

As a side note, to replace an app you’ve already installed, this command:

$ adb -s install -r bin/Galcon-debug.apk

Error that appears on my device: “Sorry! The application Galcon (process com.galcon.igalcon) has supped unexpectedly. Please try again.”

To debug:

$ adb -s logcat

And I get to see a lovely dump of errors as I have them:

E/AndroidRuntime( 1960): java.lang.RuntimeException: Unable to start activity ComponentInfo{com.galcon.igalcon/com.galcon.igalcon.Galcon}: java.lang.ArithmeticException: divide by zero

Here’s a link to a page that talks more about adb, getting a shell on the device, and other fun goodies:

http://developer.android.com/guide/developing/tools/adb.html

Step 4 – Getting Java to call C functions:

Now I’m going to try and get Java to call out to the C / C++ code I built yesterday. At this point I’m going to send a thanks out to James Brown (Ancient Frog) who lent me a few lines of his attempt at an Android port. There are lots of tutorials and documentation on-line for JNI stuff, but seeing real code that is in the ballpark of what I want to do is a huge help. I’ll be posting a few snippets as I go in this blog, but if you do want to really learn about JNI, there is a ton of information.

First of all, in Galcon.java, in my Galcon class, I’ve sprinkled a handful of references to native functions:

public native void init();
public native void loop();
public native void paint();

In onCreate() I’ve added a call to init().

And then I created a myjni.cpp file which I filled with templates like this. I love all the ludicrous namespacing. I’m not sure who it is helping, but I’m pretty sure it isn’t me.

JNIEXPORT void JNICALL Java_com_galcon_igalcon_Galcon_loop(JNIEnv* env) { /* do stuff here */ }

After building and attempting to run I get this error from logcat:

W/dalvikvm( 2168): No implementation found for native Lcom/galcon/igalcon/Galcon;.init ()

I definitely need to add myjni.cpp to my jni/Android.mk and re-run ndk-build.

Tip: if you want to do some logging to the Android message log:

#include
#define MYLOG(msg) __android_log_write(ANDROID_LOG_ERROR,"MYLOG()",msg);

Seems to do the trick.

I’m still getting the error, so I think my .so isn’t being loaded. I add this before I call init to load the shared library:

System.loadLibrary("igalcon2");

I get a NEW error:

E/AndroidRuntime( 2255): java.lang.UnsatisfiedLinkError: Library igalcon2 not found

I guess libigalcon2.so isn’t being packaged. Gotta check into this. An unzip -v of the package reveals that libigalcon2.so is being included in the package. But I found this error in logcat:

W/dalvikvm( 2338): JNI_OnLoad returned bad version (0) in /data/data/com.galcon.igalcon/lib/libigalcon2.so 0x449e1260

I guess I need to make sure I’m returning the right version in my JNI_OnLoad function. This is my function:

JNIEXPORT jint JNICALL JNI_OnLoad(JavaVM* vm, void* reserved) {
  JNIEnv* env;
  if (vm->GetEnv((void**)&env, JNI_VERSION_1_4) != JNI_OK) {
      MYLOG("JNI_OnLoad(): GetEnv failed");
      return -1;
  }
  return JNI_VERSION_1_4;
}

That seemed to work fine. So I’ve got JNI up and running and talking to my C code. I was able to get my various JNI functions calling my Galcon functions with no trouble.

Step 5 – Setting up an OpenGL context in Java:

logcat reveals that I’m getting a TON of OpenGLES errors similar to: “E/libEGL ( 2463): call to OpenGL ES API with no current context (logged once per thread)” .. This is pretty self explanatory. Time to figure this one out.

This page seems to reveal how to set up an OpenGL context:

http://developer.android.com/resources/samples/ApiDemos/src/com/example/android/apis/graphics/GLSurfaceViewActivity.html

And this seems to be how to set up and OpenGL renderer:

http://developer.android.com/resources/samples/ApiDemos/src/com/example/android/apis/graphics/CubeRenderer.html

Sort of bodging those together got me pretty far. At least, I know my GLES code is being called and I’m not seeing errors.

Step 6 – Getting C to call a Java method (to load a texture):

I gotta get my texture images loading up so that my paint code is rendering something a bit more interesting to the screen. In this case instead of Java calling C, I need my C code calling Java code. So it’s like JNI in reverse. Or something. Here’s the documentation on doing just that:

http://java.sun.com/developer/onlineTraining/Programming/JDCBook/jniref.html#call

You’ll note that no matter how we do this, we gotta have access to an “env” or something. I’m going to set up some kind of awful global variable that will be available to all my code so that I can use “env” to do stuff like this. I put this at the top of my JNI calls:

JNIEnv *_my_jnienv = 0;
void set_jnienv(JNIEnv *env) { _my_jnienv = env; }
JNIEnv *env *get_jnienv() { return _my_jnienv; }

And added set_jnienv(env); to the top of each call. Now in my other “driver” code I can call get_jnienv() to get it back.

Here’s my dummy load_texture method on the Java side:

    public static int load_texture(String fname) {
        Log.v("load_texture",fname);
        return 0;
    }

Here’s my C function that calls it:

int jni_load_texture(const char *s) {
    JNIEnv *env = get_jnienv();
    jclass cls = env->FindClass("com/galcon/igalcon/Galcon");
    jmethodID mid = env->GetStaticMethodID(cls,
	       "load_texture",
	       "(Ljava/lang/String;)I");
    // there could be some exception handling happening here, but there isn't
    jint ret;
    jstring mystr = env->NewStringUTF(s);
    ret = env->CallStaticIntMethod(cls, mid, mystr);
    return ret;
}

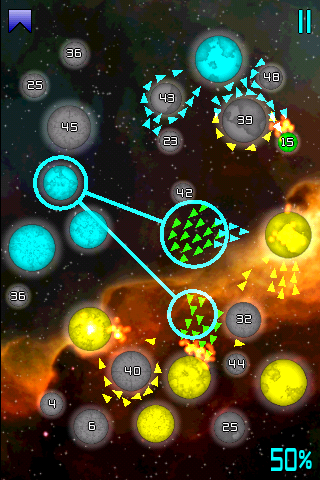
Pretty gruesome, but it seems to get the job done. Now if I can fill in my java load_texture method with something that works, I think I’ll have visuals! Here it is:

import android.graphics.BitmapFactory;
import android.graphics.Bitmap;
import android.content.res.AssetManager;
import android.opengl.GLUtils;
import android.opengl.GLES10;
import java.io.InputStream;
import java.io.IOException;

// gl is a GL10 instance, grabbed from within my renderer.  app is my Galcon Activity.

    public static int load_texture(String fname) {
        Log.v("load_texture",fname);

        AssetManager am = app.getAssets(); //new android.content.res.getAssets();

        try {
            InputStream stream = am.open(fname);
            Bitmap bitmap = BitmapFactory.decodeStream(stream);
            int[] textures = new int[1];
            gl.glGenTextures(1, textures, 0);
            int textureID = textures[0];
            gl.glBindTexture(GL10.GL_TEXTURE_2D, textureID);

            // no mipmaps
            gl.glTexParameterf(GL10.GL_TEXTURE_2D, GL10.GL_TEXTURE_MAG_FILTER, GL10.GL_LINEAR);
            gl.glTexParameterf(GL10.GL_TEXTURE_2D, GL10.GL_TEXTURE_MIN_FILTER, GL10.GL_LINEAR);

            GLUtils.texImage2D(GL10.GL_TEXTURE_2D, 0, bitmap, 0);

            return textureID;
        } catch(IOException e) {
//             Log.v("load_texture:open() fail");
            return 0;
        }
    }

Not trivial, but this saves me from having to decompress the files in C land. I currently don’t have any image decompression code that I use regularly so this works for me.

Android Day 2: The NDK

Wednesday, July 21st, 2010

The goal today is to get the Galcon codebase to compile using the NDK.  This will create a single .so file which will be accessed via JNI.

Step 1 – Downloading the NDK:

Download the NDK for native C/C++ code.  I plan on doing as little Java as possible, so I’m going to find out how well this stuff works.

http://developer.android.com/sdk/ndk/index.html

Step 2 – Building a NDK sample:

Trying to build an NDK sample.  I went into ndk/samples/<whatever> and ran ../../ndk-build (as per instructions in previous link).  This worked fine.

But when running in Eclipse, I had some trouble with some examples, but not with some of the other ones.  I’m not sure what that is about, but for now I’m going to forge on and not worry about it.

Step 3 – Preparing my project for the NDK:

I’ve created an android folder in my Galcon project for storing all this ports info.  I’ve created

android/jni/ # a folder

android/jni/Android.mk # a makefile containing

LOCAL_PATH := $(call my-dir)
include $(CLEAR_VARS)
LOCAL_MODULE := igalcon2
SRCDIR := ../../src
LOCAL_CFLAGS := -DANDROID_NDK \
-DDISABLE_IMPORTGL \
-DHAS_SOCKETLEN_T \
-DBUILD_IGALCON2 \
-DBUILD_ANDROID \
-DGC_BUILD_ANDROID
LOCAL_C_INCLUDES := \
$(LOCAL_PATH)/../../src \
$(LOCAL_PATH)/../../src/igalcon1 \
$(LOCAL_PATH)/../../src/igalcon1/enet
LOCAL_SRC_FILES := \
importgl.c \
$(SRCDIR)/main.cpp $(SRCDIR)/data.cpp $(SRCDIR)/driver-sdl.cpp $(SRCDIR)/timer.c \
$(SRCDIR)/game2.cpp $(SRCDIR)/level.cpp $(SRCDIR)/mygl.cpp \
$(SRCDIR)/menu.cpp $(SRCDIR)/theme.cpp $(SRCDIR)/myview.cpp $(SRCDIR)/pause.cpp \
$(SRCDIR)/settings.cpp $(SRCDIR)/multi.cpp $(SRCDIR)/help.cpp \
$(SRCDIR)/igalcon1/server.c \
$(SRCDIR)/igalcon1/game.c \
$(SRCDIR)/igalcon1/level.c \
$(SRCDIR)/igalcon1/states.c \
$(SRCDIR)/igalcon1/engine.c \
$(SRCDIR)/igalcon1/menu.c \
$(SRCDIR)/igalcon1/missions.c \
$(SRCDIR)/igalcon1/net.c \
$(SRCDIR)/igalcon1/multi.c \
$(SRCDIR)/igalcon1/client.c \
$(SRCDIR)/igalcon1/web.c \
$(SRCDIR)/igalcon1/timer.c \
$(SRCDIR)/igalcon1/md5.c \
$(SRCDIR)/igalcon1/viewgl.c \
$(SRCDIR)/igalcon1/enet/*.c
LOCAL_LDLIBS := -lGLESv1_CM -ldl -llog
include $(BUILD_SHARED_LIBRARY)

LOCAL_PATH := $(call my-dir)

include $(CLEAR_VARS)

LOCAL_MODULE := igalcon2

LOCAL_CFLAGS := #VARIOUS C FLAGS for define hacks

LOCAL_C_INCLUDES :=  #VARIOUS INCLUDE FOLDERS, RELATIVE TO android/jni/, so ../../src

LOCAL_SRC_FILES := #The c files, ../../src/whatever.c

LOCAL_LDLIBS := -lGLESv1_CM -ldl -llog

include $(BUILD_SHARED_LIBRARY)

android/default.properties # a file needed to build properly

this file must contain:

“target=android-4” for GLES

It instructs ndk-build which platform we’re using.  Without it, the NDK can’t find the GLES headers.

Then I was able to run ndk-build while in the android folder and it started building my project.

Step 4 – OpenGL Includes:

I had to manage some various quirks in the C code and whatnot as I went.

The includes for GLES:

#include <GLES/gl.h>

#include <GLES/glext.h>

Step 5 – Installing a port of STL for the NDK:

Then I found that STL is not supported in the NDK.  So I grabbed stlport from www.stlport.org .. Not needing iostream, etc myself, I just moved the stlport folder over so I could include templates from it.  This gave endianess and compiler unrecognized type errors.  Found this android specific STL port (should be patched into newer versions of stlport eventually.)

http://www.anddev.org/viewtopic.php?p=29939

I had to add this to my CPPFLAGS: -D_STLP_USE_SIMPLE_NODE_ALLOC to avoid having it complain “stlport/stl/_alloc.h:210: undefined reference to `std::__node_alloc::_M_allocate(unsigned int&)”

From here it looks like a long way till I have a port working though.  I need to get graphics rendering, touch input, keyboard input, music handling, and other little things that just make the game work.  If anyone can give me tips on this tonight, feel free 🙂  I’m not excited about using JNI for all this.  I’ve heard there are SDL ports, which I’m going to be considering.  I also hear I’ve got to download all the game assets separately from the game itself, which seems painful.  Time will tell on if this port will work out.

Android Day 1: SDK, Eclipse IDE, and device activation

Tuesday, July 20th, 2010

Hey .. So I’m going to TRY and port Galcon to the Android.  There’s no promises yet, but we’re going to do what we can here.  If the port isn’t working in about a week, I’ll be giving up.

Step 1 – Download the SDK:

Download the SDK – http://developer.android.com/sdk/index.html

Using the package manager, I got all the versions of the SDK that are NDK and OpenGLES compatible.  I think we’re talking 1.6+.

Step 2 – Download Eclipse IDE:

Download Eclipse IDE – http://www.eclipse.org/downloads/

I grabbed the Eclipse Classic package since that seemed to be the best guess for doing Java / C / C++ code.  I would have opted not to bother downloading Eclipse, but all the tutorials seem to mention it, and I’ve got to start somewhere.  From what I can tell it’s what everyone uses for development.

Step 3 – Install the Android ADT plugin into Eclipse:

Install the Android ADT plugin into Eclipse:

You do this by first going into Eclipse > Preferences > Install/Update > Available Software Sites > and adding the Android one as specified in Step 1.

Then go to Eclipse > Help (???) > Install new software > Select the android source > check developer tools > next > … finish >

Step 4 – Completing the “Hello World” tutorial:

Complete the hello world tutorial.

http://developer.android.com/resources/tutorials/hello-world.html

I found that booting up the Android VM took ages, so be patient.  Eventually your “Hello World” app will start.  It took at least 2-3 minutes here.

Step 5 – Activating the Droid:

Now that I’ve got an app running in the VM, I want to get it running on my Droid and Nexus One.  Let’s figure out what to do now …

http://www.vogella.de/articles/Android/article.html#deployondevice – has some instructions.

Turn on “USB Debugging” on your device in the settings. Select in the settings Applications > Development, then enable USB debugging. You also need to install the driver for your mobile phone. For details please see Developing on a Device . Please note that the Android version you are developing for must be the installed version on your phone.

(in Eclipse, you can get to this option by clicking the black down arrow next to the big green Run arrow) To select your phone, select the “Run Configurations”, select “Manual” selection and select your device. (The selection of your device doesn’t actually happen until you press Run.)

And, we have lift-off!  I’ve got my first Android app running on my Droid phone!  I must say, activating this device was a delight compared to the Palm experience.  This took a few minutes to google the instructions, but the process itself took me about 30 seconds.  (Palm took all day.)  Unfortunately, I suspect this will be countered by the increased difficulty of actually doing the port.

Step 6 – Activating the Nexus One:

Unboxed the Nexus One and repeated Step 5.  No problems.  Man is development activation of these devices easy.

Tomorrow I’ll be working on getting the NDK up and running and see how far I can get with understanding the mysterious relationship between C and Java.

2 years of iPhone Galcon!

Tuesday, July 20th, 2010

Hey,

To celebrate two crazy years of iPhone Galcon, I’m putting the game on sale for $1! If you don’t have it already, or have friends who haven’t gotten it .. well .. get it now!

Here’s a recap of where we’ve been over the last two years:

Early in development – June 2008

Original menus – June 2008, background was changed by launch

Galcon’s launch screenshot – July 2008

Soon after Galcon got multiplayer! Here’s a shot of me testing it under linux!

In March 2009, I won the IGF Innovation in Mobile Game Design award at GDC’09!
n536805207_1584367_961091

I decided to polish up the look of Galcon a few notches, and launched a graphical overhaul in July ’09. Apparently I didn’t tell anyone because I can’t find any blog posts about it, but here are some screens:

Then in September ’09 I launched Galcon Labs, which included 4 new game modes for Galcon!

I’m not entirely sure what the coming year will hold for Galcon, but I bet it’ll be swell!
-Phil

Porting to Palm / WebOS

Wednesday, July 14th, 2010

I’ve just completed and submitted my port of Galcon to the Palm. The entire process took 2.5 days. Here’s my play-by-play of the porting process. A huge thanks goes out to Mike Kasprzak for hand-holding me through the process and co-writing this post.  If you’re doing a Palm port, be sure to read the whole blog post over before you begin so you get the big picture.  Also, not everything is exactly in the right order, so that’ll give you the birds-eye view.

Day 1: Preparing the device for Development

11:00

– Unbox the Palm Pre Plus.

– Figure out how to plug in the USB.  This is a bit tricky, you gotta really yank on that plastic tab on the side to get it off.

11:30

– Use WebOS Doctor to flash the device with latest OS

http://ws.palm.com/webosdoctor/sorry.htm

12:00

– Activate phone.  If your phone isn’t activated, you use a program that can bypass activation

http://developer.palm.com/index.php?option=com_content&view=article&id=2051&Itemid=30

12:15

– Connected to local WiFi on activated device

12:30

– Final preparation of the device for development.

http://developer.palm.com/index.php?option=com_content&view=article&id=1973&Itemid=336

“Card view” is the view where you can see a view of all the open apps minimized. Apps are called Cards.

12:45

– ssh onto the device, password is blank

$ ssh -oPort=10022 root@localhost
root@localhost’s password:
root@palm-webos-device:/var/home/root#

1:00

– Install the Palm SDK and PDK, read whole document so you know where the cross-compiling binaries are located. It varies depending on windows / mac.

http://developer.palm.com/index.php?option=com_content&view=article&id=1970&Itemid=335

1:30

– Install a SSH key.  This way I don’t have to keep pressing return on the password entry during SSH sessions.

$ pdk-ssh-init localhost:10022

1:45

– Verify installation by using a Palm demo app.  This is an important step!  This step shows you where the example code and scripts are and you’ll be referring to those when you build your own build/deploy/packaging scripts for your own app.  And if it works, you know your Palm is ready to go!

http://developer.palm.com/index.php?option=com_content&view=article&id=1974&Itemid=336

– Errors about not finding various .so files can be ignored

– [This should be irrelevant as Palm gets their SDK’s and firmware all synced across the networks] The PDL_Init error is actually the device talking back to you.  I had to go into the src folder and comment out PDL_Init to get it to run. This error is due to the 1.4.1.1 firmware on my Palm Pre Plus .. 1.4.5 is required for apps.  Had to do some hacks to get around this, won’t bother explaining, as this shouldn’t matter in a few days.]

3:00

– Rebuild simple sample app with PDL_Init included, works fine

3:30

– Got a copy of Mike’s app and tried it out.  Works nicely.

Day 2: Porting the App

– 10:30

Hacking up the /opt/PalmPDK/share/samplecode/simple/mac example building, packaging and deployment scripts.  Mostly just getting them to work with my code.  Was pretty straightforward if you know shell stuff.  I’m doing my work on the Mac, so I have a bash shell at hand all the time.

– 11:30

Got it compiling with a few tweaks. using rsync over ssh to deploy my game 🙂  I’m a big fan of rsync.  Here’s my “deploy” script:

rsync -v -urt –exclude ‘*~’ –exclude tmp –exclude .svn -e “ssh -oPort=10022” ./out/ root@localhost:/media/internal/galcon

– 12:00

I had trouble loading images to textures.  But this was mostly due to my own dumbness.  Ended up being really straightforward.  Used SDL_image to load, converted it to 32 bit, then loaded it in.

– 1:30

.mp3’s won’t play with SDL_Mixer, so you must use oggs instead, check out this hack that I use to covert my “.mp3” extensions to “.ogg”:

sprintf(f,”%s/%s”,DRIVER_DATADIR,fname);
int l = strlen(f);f[l-3]=’o’;f[l-2]=’g’;f[l-1]=’g’;

– 1:45

SDL keyboard events not passing numbers when I use the Palm number presser key.

This is a palm bug, I should file a bug report. If the user holds down the NUMBER key, and then pressed a letter, they get the proper number.

-5:30

Handled SDL_ACTIVEEVENT to switch game into pause mode when being minimized.
if ((e.active.state&SDL_APPACTIVE)!=0 && e.active.gain == 0) { /* pause game */ }

– 6:00

Added a few PDL_ calls.  I’m really liking the set of lightweight functions they give you.  They cover most all the stuff you need for game integration in just a few calls.

http://developer.palm.com/index.php?option=com_content&view=article&id=1990&Itemid=340

#include “PDL.h”

PDL_Init(0); // in init function
PDL_GetCallingPath(char *buffer, int bufferLen); // to find out where our app is being launched from so i can find my data files
PDL_GetDataFilePath(char *dataFileName, char *buffer, int bufferLen); // find out where my app can write save games and settings.. the buffer is a fullpath to where we can save a file to
PDL_LaunchBrowser(const char* Url); // go to interwebs
PDL_Quit(); // wrap it up

Here are a few tips from Mike that I found really helpful:

About the Palm itself:

  • There’s a touch strip beneath the LCD screen. Gesture up or down from the middle of the strip to bring up the menu.
  • To “Card” (minimize) a running application, gesture upward or tap on the gesture strip
  • To close an application, throw the card away (up)
  • To delete an application, hold down the keyboard button with a square on it, then tap the icon of the app you want to remove.
  • When you plug a device in, Just Charge is the ideal mode. USB mode is useful for copying files via drag+drop, but you can’t run things while in USB mode

Linkable Libraries

  • -lSDL
  • -lGLES_CM (for OpenGL ES 1.1)
  • -lGLESv2 (for OpenGL ES 2.0)
  • -lSDL_mixer
  • -lpdl (Palm specific calls)

SDL Tips

The following call is required BEFORE setting your graphics mode, yet after initializing SDL

SDL_GL_SetAttribute(SDL_GL_CONTEXT_MAJOR_VERSION, 1);

The number represents the OpenGL ES version. 1 for 1.1, 2 for 2.0.

webOS actually supports blending what you do against hardware decoded video. Unfortunately, this feature is on by default. The alpha value in the frame buffer decides weather video will bleed through or not (even if no video is displayed). To disable writing Alpha to the framebuffer, use this call.

    glClearColor(0,0,0,1);
    glClear(GL_COLOR_BUFFER_BIT);
    glColorMask(GL_TRUE, GL_TRUE, GL_TRUE, GL_FALSE);

Day 2.5: Packaging the App

Time to figure out how to package this into a sellable .. package!  I used Mike’s app and found that we really don’t need all the skeleton stuff palm-generate can generate for you.

http://developer.palm.com/index.php?option=com_content&view=article&id=1976&Itemid=375

You need an appinfo.json file in your distribution folder. It should contain something like this:
{
“id”: “com.galcon.app.igalcon”,
“version”: “1.9.8”,
“vendor”: “GALCON.COM”,
“type”: “pdk”,
“main”: “galcon”,
“title”: “Galcon”,
“icon”: “icon.png”,
“requiredMemory”: 48
}

I ssh’d in and used top to figure out my required memory.

And also a framework_config.json containing:
{
“logLevel”: 99,
“debuggingEnabled”: true,
“timingEnabled”: false,
“logEvents”: false,
“escapeHTMLInTemplates” : true
}

And lastly, I gotta include icon.png . Palm specifies this:

“Application icons should be 1 in. square, 64 x 64 pixels, encoded as a PNG with 24 bit/pixel RGB and 8 bits alpha. The icon’s image should be about 56 x 56 pixels within the PNG bounds.”

And lastly create this file:
package.properties containing:
filemode.755=your_app_binary

Then just copy all those files, and the app files into a folder named the same as your app id (com.galcon.app.igalcon for example) then run palm-package against that folder and you’re done!  Here’s a checklist from Palm that helped me through a few things:

http://developer.palm.com/blog/2010/07/a-quick-pdk-submission-checklist/

Then you just send that app package off to Palm! Have fun!

-Phil